Wondering how to clean inside of a motorcycle helmet? The answer is yes, you absolutely need to clean the inside of your motorcycle helmet! A dirty helmet interior can harbor bacteria, cause odors, and even degrade the materials over time. This guide will walk you through the best helmet liner cleaning methods so you can enjoy a fresh, comfortable, and safe ride.
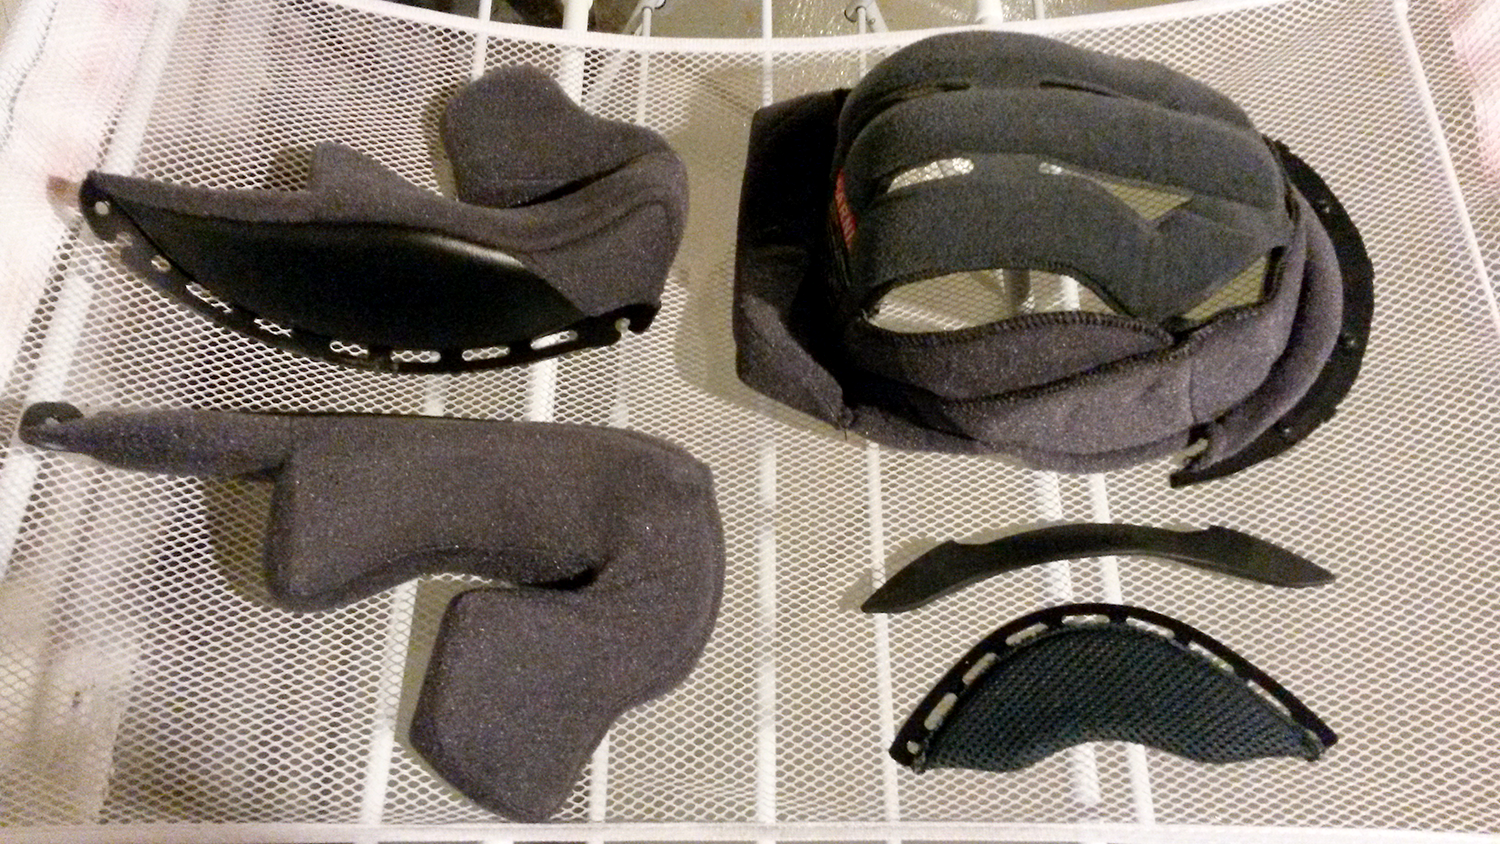
Image Source: soundrider.com
Why Clean Your Motorcycle Helmet Interior?
Your helmet works hard. It absorbs sweat, dirt, oils from your skin and hair, and road grime. Over time, this buildup creates a breeding ground for bacteria and fungi. This not only smells bad but can also cause skin irritation and even infections. Regular motorcycle helmet interior cleaning extends the life of your helmet and keeps you comfortable.
Here’s a quick rundown of the benefits:
- Eliminates odors.
- Prevents skin irritation.
- Extends the life of your helmet.
- Improves hygiene.
- Enhances comfort.
- Maintains helmet integrity.
Preparing to Clean Your Helmet
Before you dive in, gather your supplies and prepare your workspace.
Gather Your Supplies
You’ll need the following items:
- Mild dish soap or specialized safe helmet cleaning products.
- Soft cloths or microfiber towels.
- Warm water.
- A bucket or sink.
- A soft brush (like a toothbrush).
- Optional: Helmet cleaner spray or odor eliminator.
- Optional: Baking soda.
- Optional: Dehumidifier or fan for drying.
Inspect Your Helmet
Before cleaning, inspect your helmet for any damage, such as cracks in the shell or loose components. Cleaning a damaged helmet won’t fix the underlying issue, and it might be time for a replacement.
Remove Removable Parts
Many helmets have removable liners and cheek pads. If yours does, carefully remove them according to the manufacturer’s instructions. This makes helmet padding cleaning much easier and more effective. Note how each piece fits so you can reassemble it correctly later.
Step-by-Step Guide to Cleaning Your Motorcycle Helmet Interior
Follow these steps to get your helmet smelling fresh and feeling clean. This section will address the steps to clean motorcycle helmet interior
Step 1: Cleaning Removable Liners and Cheek Pads
If your helmet has removable liners and cheek pads, this is the first place to start.
- Soak the Liners: Fill a bucket or sink with warm water and a small amount of mild dish soap or a helmet foam cleaning solutions. Submerge the liners and cheek pads, and gently agitate them to release dirt and sweat.
- Gently Wash: Use your hands to gently massage the liners and pads. Avoid harsh scrubbing, which can damage the foam. A soft brush can be helpful for stubborn spots.
- Rinse Thoroughly: Rinse the liners and pads thoroughly under clean, running water until all traces of soap are gone.
- Remove Excess Water: Gently squeeze out excess water. Do not wring or twist the liners, as this can damage their shape and integrity.
- Air Dry: Allow the liners and pads to air dry completely. Avoid direct sunlight or heat, as this can degrade the materials. Placing them near a dehumidifier or fan can speed up the drying process.
Step 2: Cleaning the Helmet Shell Interior
Even if your helmet has removable liners, the interior shell still needs cleaning.
- Prepare Cleaning Solution: In a clean bucket or bowl, mix warm water with a small amount of mild dish soap or a dedicated helmet liner cleaning methods.
- Dampen a Cloth: Dip a soft cloth into the cleaning solution and wring out the excess water. You want the cloth to be damp, not soaking wet.
- Wipe Down the Interior: Gently wipe down the entire interior of the helmet shell. Pay close attention to areas that come into contact with your forehead, cheeks, and chin.
- Rinse with a Clean, Damp Cloth: Use a clean, damp cloth to wipe away any soap residue.
- Dry the Interior: Use a dry cloth to absorb any remaining moisture. Allow the helmet to air dry completely in a well-ventilated area.
Step 3: Dealing with Non-Removable Liners
If your helmet’s liner is not removable, you’ll need to clean it in place. This requires a bit more care to avoid getting the helmet too wet.
- Prepare Cleaning Solution: As before, mix warm water with a small amount of mild dish soap or a specialized helmet cleaner.
- Apply Cleaning Solution: Dampen a soft cloth with the cleaning solution and gently dab the interior of the helmet. Avoid saturating the liner.
- Gently Scrub: Use the damp cloth to gently scrub the liner, paying attention to areas with visible dirt or sweat. A soft brush can be helpful for hard-to-reach spots.
- Rinse: Use a clean, damp cloth to dab the liner and remove any soap residue.
- Dry: Use a dry cloth to absorb as much moisture as possible. Allow the helmet to air dry completely in a well-ventilated area. Using a fan or dehumidifier can significantly speed up the drying process.
Step 4: Removing Odors
Even after cleaning, lingering odors can sometimes persist. Here are some removing odors from motorcycle helmet solutions:
- Baking Soda: Sprinkle baking soda inside the helmet and let it sit for several hours or overnight. Baking soda absorbs odors. Vacuum out the baking soda before using the helmet.
- Odor Eliminator Sprays: Use a commercially available odor eliminator spray specifically designed for helmets. Follow the product instructions carefully.
- Air Fresheners: Place a small, breathable bag of potpourri or a dryer sheet inside the helmet for a fresh scent. Be sure it doesn’t block any vents.
Step 5: Disinfecting Your Helmet
To kill bacteria and fungi, especially if you’ve been sweating a lot, consider disinfecting your helmet. Learn how to disinfect helmet lining with these methods:
- Disinfectant Sprays: Use a disinfectant spray specifically designed for helmets. Be sure it is safe for the materials used in your helmet. Follow the product instructions carefully.
- UV Sanitizers: Some devices use UV light to sanitize helmets. These can be effective at killing bacteria and fungi without using chemicals.
- Tea Tree Oil: Mix a few drops of tea tree oil (a natural antifungal and antibacterial agent) with water in a spray bottle. Lightly spray the interior of the helmet and let it air dry. Be cautious, as some people are sensitive to tea tree oil.
Additional Tips and Considerations
- Read the Manufacturer’s Instructions: Always consult the manufacturer’s instructions for specific cleaning recommendations for your helmet model.
- Avoid Harsh Chemicals: Do not use harsh chemicals, solvents, or abrasive cleaners, as these can damage the helmet’s shell and liner.
- Never Put Your Helmet in the Washing Machine or Dryer: This can damage the helmet’s structural integrity and void the warranty.
- Clean Regularly: Aim to clean your helmet’s interior every few weeks, or more frequently if you sweat a lot or ride in dusty conditions.
- Store Your Helmet Properly: Store your helmet in a clean, dry place away from direct sunlight and extreme temperatures.
- Replace When Necessary: Helmets have a limited lifespan. Even if your helmet looks clean, the protective materials can degrade over time. Replace your helmet every 3-5 years, or sooner if it has been involved in an accident.
Motorcycle Helmet Maintenance Tips
Here are some general motorcycle helmet maintenance tips to keep your helmet in top condition:
- Handle with Care: Avoid dropping or bumping your helmet, as this can damage the shell and liner.
- Clean the Visor Regularly: Use a mild soap and water solution to clean your visor, and avoid using abrasive cleaners that can scratch it.
- Inspect the Straps and Fasteners: Regularly inspect the helmet straps and fasteners for wear and tear. Replace them if necessary.
- Keep Vents Clear: Make sure the helmet’s vents are clear of debris to ensure proper ventilation.
- Use a Helmet Bag: When not in use, store your helmet in a helmet bag to protect it from dust and scratches.
- Consider a Helmet Liner: Wear a thin helmet liner or skullcap under your helmet to absorb sweat and keep the interior cleaner.
Choosing the Right Cleaning Products
Selecting the appropriate cleaning products is crucial for preserving the integrity of your helmet. Prioritize safe helmet cleaning products designed specifically for helmet materials.
| Product Type | Description | Benefits | Cautions |
|---|---|---|---|
| Mild Dish Soap | Gentle, pH-neutral soap. | Effective at removing dirt and sweat. Widely available and inexpensive. | Use sparingly; too much soap can leave residue. Ensure thorough rinsing. |
| Helmet Cleaner Sprays | Formulated specifically for helmet materials. | Designed to clean without damaging the shell, liner, or visor. Often includes antibacterial and odor-eliminating properties. | Can be more expensive than other options. Ensure the product is compatible with your helmet’s materials. |
| Microfiber Cloths | Soft, non-abrasive cloths. | Excellent for gently wiping surfaces without scratching. Effective at lifting dirt and grime. | Ensure the cloths are clean and free of debris before use. |
| Baking Soda | Natural deodorizer. | Absorbs odors effectively. Safe for most materials. | Use sparingly and vacuum out completely to avoid residue. |
| Disinfectant Sprays | Kills bacteria and fungi. | Helps to maintain hygiene, especially after heavy sweating or use in humid conditions. | Choose a product specifically designed for helmets. Ensure it is safe for the helmet’s materials. Ventilate well after use. |
| Tea Tree Oil | Natural antifungal and antibacterial agent. | Can help to eliminate odors and prevent the growth of bacteria and fungi. | Use sparingly and dilute with water. Be cautious, as some people are sensitive to tea tree oil. Test on a small area first. |
What About Cleaning Sweaty Motorcycle Helmet Situations?
Riding in hot weather often leads to a cleaning sweaty motorcycle helmet scenario. To address this:
- Immediate Action: Wipe down the helmet interior with a damp cloth after each ride to remove excess sweat.
- Increased Frequency: Increase the frequency of full cleanings.
- Helmet Liners: Use disposable or washable helmet liners to absorb sweat.
- Proper Ventilation: Ensure your helmet vents are open to promote airflow and reduce sweat buildup.
Signs Your Helmet Needs Replacing
Besides regular cleaning, be aware of signs that indicate your helmet needs replacement:
- Impact: Any impact, even a minor one, can compromise the helmet’s protective ability.
- Age: Replace your helmet every 3-5 years, regardless of its condition.
- Loose Fit: If the helmet no longer fits snugly, it’s time for a new one.
- Damage: Cracks, dents, or a deteriorating liner indicate the helmet should be replaced.
- Comfort: Changes in comfort due to breakdown of materials indicate it’s time to replace it.
FAQ:
What is the best way to clean helmet padding?
The best way to clean helmet padding is to remove it (if possible), soak it in warm, soapy water, gently wash it, rinse thoroughly, and air dry it.
Can I use bleach to clean my motorcycle helmet?
No, you should never use bleach to clean your motorcycle helmet. Bleach can damage the helmet’s materials and compromise its protective ability.
Who makes the best motorcycle helmet cleaner?
Many brands make excellent motorcycle helmet cleaners. Look for products specifically designed for helmet materials and read reviews to find one that suits your needs. Brands like Motul, Muc-Off, and S100 are popular choices.
How often should I clean my motorcycle helmet?
Ideally, clean your motorcycle helmet every few weeks, or more frequently if you ride often or sweat a lot.
Can I put my helmet in the dishwasher?
No, never put your helmet in the dishwasher. The high heat and harsh detergents can damage the helmet’s shell and liner.
How long does it take for a motorcycle helmet to dry?
It can take anywhere from a few hours to overnight for a motorcycle helmet to dry completely, depending on the humidity and ventilation. Using a fan or dehumidifier can speed up the process.
Unlock the secret to a helmet that stays pristine, odor-free, and road-ready for the long haul with this all-encompassing guide. Giving your helmet’s interior a regular refresh isn’t just about comfort; it’s a cornerstone of being a truly conscientious rider.

Hi, I’m Hector Quintanilla, the creator of helmetslab.com.. As a passionate enthusiast and experienced expert in helmets, I’ve dedicated this platform to sharing my insights, knowledge, and hands-on experiences. Whether you’re seeking the best helmet for safety, comfort, or performance, my goal is to guide you with detailed reviews, tips, and advice. Ride safe, and let’s explore the world of helmets together!