
Have you ever looked up at your car’s ceiling and seen it sagging, like a sad, defeated cloud? It’s a common problem, and it can really make your car feel old and unloved. Choosing the right glue for your headliner might seem like a small detail, but it’s actually a big deal.
The wrong adhesive can lead to a sticky mess, a headliner that falls down again, or even damage to your car’s interior. It’s frustrating when you just want a clean, finished look. You want something that holds strong, dries clear, and doesn’t make a mess.
This post will guide you through the world of headliner adhesives. We’ll break down what makes a good glue and help you pick the perfect one for your project. By the end, you’ll feel confident about choosing an adhesive that will keep your headliner looking great for years to come.
Our Top 5 Adhesive For Headliners Recommendations at a Glance
| Image | Product | Rating | Links |
|---|---|---|---|
 |
3M Headliner & Fabric Adhesive | 8.6/10 | Check Price |
 |
Permatex 27828 Body Shop Heavy Duty Headliner Adhesive | 8.6/10 | Check Price |
 |
3M Headliner & Fabric Adhesive | 9.3/10 | Check Price |
 |
3M Super 77 Multi-Surface Spray Adhesive | 8.8/10 | Check Price |
 |
Car Headliner Adhesive | 8.7/10 | Check Price |
Top 5 Adhesive For Headliners Detailed Reviews
1. 3M Headliner & Fabric Adhesive
Rating: 8.8/10
Reviving your car’s interior just got easier with the 3M Headliner & Fabric Adhesive. This powerful spray is specifically designed to reattach sagging headliners and repair fabric in your vehicle. It’s a go-to choice for many car enthusiasts and professionals looking for a reliable fix.
What We Like:
- It works great on automotive headliners.
- The formula dries fast, usually in 30 to 60 minutes.
- You can adjust the spray nozzle for better control.
- It dries clear, so it won’t change the color of your fabric.
- It comes in a case of 4 cans, which is handy for bigger jobs or if you need extra.
What Could Be Improved:
- The spray can is quite large, which might be a bit bulky for some to handle.
- While it dries quickly, you still need to ensure good ventilation during use.
This 3M adhesive offers a convenient and effective solution for common car interior issues. It’s a solid product that helps you restore your vehicle’s look and feel without breaking the bank.
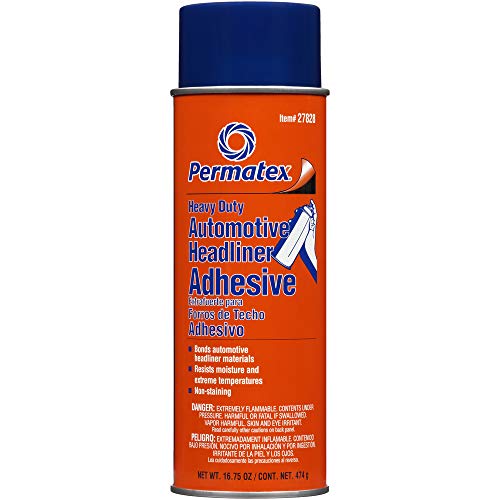
2. Permatex 27828 Body Shop Heavy Duty Headliner Adhesive
Rating: 9.4/10
Tired of that sagging headliner or loose interior trim? Permatex 27828 Body Shop Heavy Duty Headliner Adhesive is your go-to solution for bringing your car’s interior back to life. This powerful spray adhesive offers extreme holding power, making it perfect for fixing detached or loose parts like headliners, carpets, and trunk linings. It dries clear, so your repairs will look neat and professional.
What We Like:
- It has extreme holding power, so your repairs stay put.
- The high-strength formula works well even in high temperatures, up to 170°F (77°C).
- It’s easy to use for fixing many different interior parts.
- The adhesive dries clear for a clean look.
- It resists bad weather like rain, sleet, and snow.
- It’s professional grade, giving you an industrial-strength hold.
What Could Be Improved:
- The spray can is quite large (16.75 oz), which might be more than you need for small jobs.
- While it’s great for many interior parts, it’s best to test on a small, hidden area first for specific materials.
This Permatex headliner adhesive is a fantastic tool for any car owner. It provides a strong, lasting bond for your car’s interior, helping you maintain a clean and comfortable ride.
3. 3M Headliner & Fabric Adhesive
Rating: 9.2/10
Reviving your car’s interior just got easier with the 3M Headliner & Fabric Adhesive. This powerful adhesive comes in a convenient pack of two 18.1 oz aerosol cans. It’s designed to securely attach heavyweight headliners in vehicles. You can trust it to stick headliners to both metal and plastic surfaces. The spray can makes applying the glue simple and even.
What We Like:
- It provides super strong bonds for heavy headliners.
- The formula works on metal and plastic, making it very versatile.
- The aerosol can sprays a smooth, even layer of glue.
- It dries quickly in about 30 to 60 minutes.
- The adjustable nozzle helps you spray the glue exactly where you need it.
- It dries clear, so it won’t change the color of your headliner.
- The glue holds up well against moisture, heat, and cold.
- It speeds up car restoration projects because it sets fast.
What Could Be Improved:
- While the aerosol is easy to use, some users might prefer a brush-on option for very detailed work.
- The strong bond is great, but it means repositioning can be difficult if you make a mistake.
This 3M Headliner & Fabric Adhesive is a fantastic solution for anyone looking to repair or replace their car’s headliner. It offers a strong, lasting bond that can withstand tough conditions.
4. 3M Super 77 Multi-Surface Spray Adhesive
Rating: 8.8/10
Need a reliable adhesive for your next project? The 3M Super 77 Multi-Surface Spray Adhesive is a fantastic choice. This 7.35 oz can is packed with features to make your crafting and repair tasks a breeze. It dries fast and creates a clear finish, making it ideal for a variety of materials like foil, foam, paper, metal, plastic, fabric, and cardboard. Plus, its low VOC formula is a good choice for your workspace.
What We Like:
- It dries super fast, so you can move on to the next step quickly.
- It’s perfect for light materials like paper, foil, and fabric.
- Using it is simple and straightforward.
- You can reposition your items within a few minutes for perfect placement.
- It works great for crafts, school projects, and even photo albums.
- The adhesive is photo-safe, so your memories are protected.
- One can covers a large area, up to 190 sq ft.
- It sprays in a fine mist, and it won’t soak through most materials.
What Could Be Improved:
- While it’s great for light-duty jobs, it might not be strong enough for heavy-duty repairs.
- The repositioning window is only 2-3 minutes, so you need to work efficiently.
This spray adhesive is a versatile tool for many projects. Its ease of use and quick drying time make it a go-to for crafters and DIYers.
5. Car Headliner Adhesive
Rating: 9.2/10
Tired of that sagging car headliner? This 100ml Car Headliner Adhesive is your secret weapon for a quick and effective fix. It’s not just for car roofs; this versatile glue is designed to bond leather and fabric, making it a go-to for all sorts of repair and DIY projects. Its clear formula and strong hold mean you get professional-looking results without a lot of hassle.
What We Like:
- It bonds quickly and strongly, making repairs fast.
- It works on many materials, like leather and fabric, and is great for car interiors, sofas, and even patching jeans.
- The glue is heat resistant and waterproof, so it holds up well in tough conditions.
- It’s flexible and won’t get hard or crack over time.
- The formula is transparent and doesn’t have a strong smell, unlike some other glues.
- It’s a cost-effective way to fix things yourself.
What Could Be Improved:
- Complete curing takes a full day, so you need to be patient for the strongest bond.
- While it says it’s good for iron, its primary strength is in leather and fabric.
This adhesive offers a fantastic solution for fabric and leather repairs, especially in your car. It’s a reliable and easy-to-use product for many projects.
Choosing the Best Adhesive for Your Headliner
A sagging headliner can make your car’s interior look tired and worn. Luckily, fixing it is a DIY project that’s easier than you think with the right adhesive. This guide helps you pick the best glue to bring your car’s roof back to life.
Key Features to Look For
When you shop for headliner adhesive, keep these important features in mind.
1. Strong Bonding Power
You need an adhesive that sticks well. It must hold the headliner fabric firmly to the car’s ceiling without peeling. Look for glues that offer a strong, long-lasting bond.
2. Flexibility
Car interiors get hot and cold. The adhesive should be flexible enough to handle these temperature changes. It shouldn’t crack or become brittle when the weather changes.
3. Fast Drying Time
A quick drying time means you can finish your project sooner. Some adhesives dry in minutes, while others take longer. Consider how much time you have for the repair.
4. Heat Resistance
Cars can get very hot inside, especially in direct sunlight. Your headliner adhesive needs to withstand high temperatures without losing its grip.
5. Easy Application
A user-friendly applicator makes the job much simpler. Spray adhesives are popular because they cover large areas quickly. Tube glues offer more control for smaller, detailed fixes.
Important Materials
The type of adhesive you choose often depends on its main ingredients.
- Spray Adhesives: These are usually made from synthetic rubber or polymers. They come in aerosol cans and spray out a fine mist. They’re great for large, flat surfaces.
- Contact Cements: These are strong glues that create a powerful bond when they dry. They work by applying the glue to both surfaces, letting them get tacky, and then pressing them together.
- Foam Adhesives: Some glues are specifically designed for foam and fabric. They offer a flexible bond that’s perfect for headliner materials.
Factors That Improve or Reduce Quality
Certain things can make your headliner repair a success or a failure.
Factors That Improve Quality
- Clean Surfaces: Always clean both the headliner board and the fabric before applying glue. Remove old glue, dust, and dirt.
- Proper Ventilation: Work in a well-ventilated area, especially with spray adhesives. This keeps you safe and helps the glue cure properly.
- Following Instructions: Read and follow the manufacturer’s instructions carefully. This ensures you use the right amount of glue and apply it at the correct time.
- Temperature: Most adhesives work best in moderate temperatures. Avoid applying glue when it’s too hot or too cold.
Factors That Reduce Quality
- Using the Wrong Glue: Not all glues are made for headliners. Using a general-purpose glue might not hold well or could damage the fabric.
- Applying Too Much or Too Little Glue: Too much glue can soak through the fabric and stain it. Too little glue won’t create a strong enough bond.
- Rushing the Process: Not allowing the glue to become tacky enough before joining surfaces can weaken the bond.
User Experience and Use Cases
People use headliner adhesive for several reasons.
- Car Restoration: Enthusiasts often use these glues to restore classic cars, making the interior look like new.
- Repairing Sags: The most common use is fixing headliners that have started to sag due to age or heat.
- Customizing Interiors: Some people use adhesives to change their headliner fabric or add new materials for a custom look.
The right adhesive makes a big difference. By understanding these features, materials, and factors, you can confidently choose the best product to keep your car’s headliner looking great.
Frequently Asked Questions about Headliner Adhesives
Q: What is the best type of adhesive for car headliners?
A: Spray adhesives are often the best choice because they cover large areas evenly and quickly. Contact cements also work well for a strong, lasting bond.
Q: Can I use regular craft glue for my headliner?
A: No, regular craft glue is usually not strong enough and may not withstand the heat inside a car. It’s best to use an adhesive specifically designed for automotive interiors.
Q: How much adhesive do I need?
A: It depends on the size of your headliner and the product. Most spray cans cover a certain square footage, so check the label. It’s often better to have a little extra than not enough.
Q: Will the adhesive stain my headliner fabric?
A: Some adhesives can stain if applied too heavily or if they soak through. Always test a small, hidden area first. Applying a thin, even coat helps prevent staining.
Q: How long does headliner adhesive last?
A: A good quality adhesive, applied correctly, can last for many years. Factors like extreme heat and humidity can affect its lifespan.
Q: Can I remove the old adhesive?
A: Yes, it’s important to remove as much of the old adhesive as possible. This helps the new glue stick better. You can use a scraper or a special adhesive remover.
Q: What if I make a mistake and the fabric sticks wrong?
A: If the adhesive is still wet, you might be able to carefully peel it back and reposition the fabric. Once it starts to dry, it can be very difficult to fix without damaging the material.
Q: Is headliner adhesive safe to use indoors?
A: Many spray adhesives release fumes. Always use them in a well-ventilated area, even indoors. Wear a mask if you are sensitive to fumes.
Q: Can I use this adhesive on other car interior parts?
A: Some headliner adhesives are versatile and can be used on other fabric or foam parts of your car’s interior. Always check the product label for recommended uses.
Q: How do I prepare the headliner board before applying adhesive?
A: Clean the board thoroughly. Remove any old glue, dust, or debris. A smooth, clean surface is essential for a strong bond.
In conclusion, every product has unique features and benefits. We hope this review helps you decide if it meets your needs. An informed choice ensures the best experience.
If you have any questions or feedback, please share them in the comments. Your input helps everyone. Thank you for reading.

Hi, I’m Hector Quintanilla, the creator of helmetslab.com.. As a passionate enthusiast and experienced expert in helmets, I’ve dedicated this platform to sharing my insights, knowledge, and hands-on experiences. Whether you’re seeking the best helmet for safety, comfort, or performance, my goal is to guide you with detailed reviews, tips, and advice. Ride safe, and let’s explore the world of helmets together!