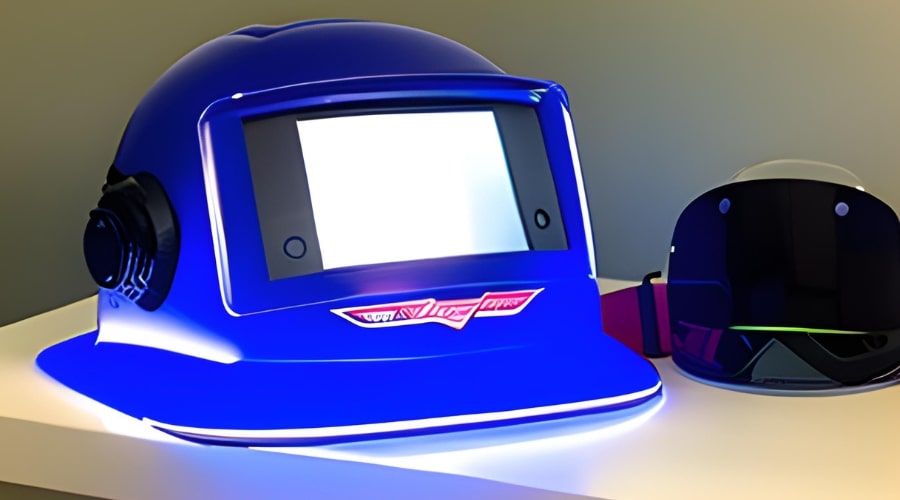
Have you ever been in a pickle, trying to see through a foggy welding helmet? Now, that’s a real head-scratcher! As a welder, your helmet is your knight in shining armor, shielding you from the dragon’s breath, or in this case, the hazardous rays and particles. The auto-darkening lens is the heart of this protective gear, a key component in ensuring your safety. Over time, though, this lens may need a replacement. But don’t fret! This guide is the perfect pit stop for learning all about the welding helmet auto-darkening lens replacement process.
Understanding Your Welding Helmet’s Auto-Darkening Lens
Before we jump headlong into the replacement process, it’s crucial to understand what an auto-darkening lens is and why it’s essential.
The Magic Behind Auto Darkening
Auto-darkening lenses are the bee’s knees! They make your life much easier by automatically adjusting the lens shade based on the light intensity produced during welding. This technology is a godsend, eliminating the need for constant manual adjustments.
Why Replace the Auto Darkening Lens?
Well, you wouldn’t drive a car with a cracked windshield, would you? The same logic applies to your welding helmet. Over time, due to wear and tear, the lens can become less effective, jeopardizing your safety. Regular lens replacement ensures you’re always looking through a clear window, keeping you safe and your work top-notch.
“Welding Helmet Auto Darkening Lens Replacement”: Step-by-step Guide
Replacing the lens of your welding helmet is not rocket science. Here’s a step-by-step guide to help you navigate this process like a walk in the park.
Step 1: Gather the Necessary Tools
First things first, you’ll need a screwdriver, a new auto-darkening lens that fits your helmet, and a clean, dry cloth.
Step 2: Remove the Old Lens
By using the screwdriver, remove the screws holding the lens in place. Be careful not to lose them, though. They’re like gold dust!
Step 3: Clean the Helmet
Before installing the new lens, clean the helmet with your dry cloth. It’s like giving your helmet a new lease on life.
Step 4: Insert the New Lens
Now, it’s showtime for your new lens! Place it in the helmet and secure it with the screws.
Troubleshooting Common Issues in Lens Replacement
Sometimes, despite your best efforts, you might run into a snag during the lens replacement process. Don’t throw in the towel just yet! Here are some common issues and how to tackle them.
Problem: The Lens Doesn’t Fit
Solution: Ensure that you’ve purchased the right size. If the shoe doesn’t fit, it’s not the right one!
Problem: The Lens Doesn’t Darken
Solution: Check the batteries and the sensor. Sometimes, the solution is as simple as replacing the batteries or cleaning the sensor.
Maintenance Tips for Longer Lens Lifespan
An ounce of prevention is worth a pound of cure, right? Here are some tips to extend the life of your auto-darkening lens:
- Regularly clean your lens with a soft, dry cloth.
- Avoid using harsh chemicals or abrasive materials for cleaning, as they might damage the lens.
- Store your helmet in a dry, clean place to avoid dust accumulation.
- Regularly check the lens for scratches or cracks.
Purchasing the Right Auto Darkening Lens Replacement
Buying the right replacement lens isn’t a shot in the dark. Consider the following factors:
Compatibility with Your Helmet
Make sure the lens fits your helmet. It’s like finding the right puzzle piece – it has to fit!
Lens Reaction Time
The lens should darken quickly enough to protect your eyes. It’s not a race, but speed matters here!
Lens Shade Range
The lens should offer a wide shade range. This way, you can handle different welding processes with ease.
Related: What Material is Used for Welding Helmets?
Frequently Asked Questions:
Q: How often should I replace my auto-darkening lens?
A: There’s no hard and fast rule here. Replace it when you notice a decrease in performance or visible damage. Safety first!
Q: Can I replace the lens myself, or should I hire a professional?
A: Absolutely, you can do it yourself! Follow the step-by-step guide above, and you’ll be as good as a pro.
Q: Where can I buy a replacement lens?
A: Replacement lenses can be found at hardware stores, online marketplaces, or directly from the helmet manufacturer.
Q: Can I use a lens from a different brand than my helmet?
A: It’s possible, but it’s crucial to ensure compatibility. Remember, the lens needs to fit your helmet perfectly.
Q: What should I do if my new lens doesn’t darken?
A: First, check the batteries and sensor. If these are fine, it might be a faulty lens. Contact the seller or manufacturer for assistance.
Q: How can I prolong the life of my lens?
A: Regular cleaning, proper storage, and avoiding harsh cleaning agents can help prolong your lens’s lifespan.
Conclusion
All’s well that ends! The welding helmet auto-darkening lens replacement process might seem daunting at first, but with a bit of patience and the right guidance, it’s a breeze. Remember, your safety is paramount, and a clear, functioning lens is instrumental in that. So don’t cut corners when it comes to lens maintenance and replacement. Happy welding!

Helmetslab is a website that focuses on providing in-depth reviews and information about different types of helmets, including motorcycle helmets and others helmets. I am writing a post with proper research on the info that helps helmet users.
